Adding Safety Handrails Along the Top Landing Edge of an Attic Opening
Adding safety handrails along the top landing edge of an attic opening is a vital step for any homeowner who uses their overhead space for storage. When you frequently climb through a ceiling access point, the risk of a fall is significant, especially when carrying boxes or navigating tight joists. Installing a barrier around the perimeter provides a necessary grip point and a physical deterrent against accidental slips.
By securing this area, you turn a hazardous architectural gap into a functional and protected transition zone. This article covers the structural requirements, materials, and safety standards necessary to successfully complete this project in your home.
Determining Height and Code Compliance
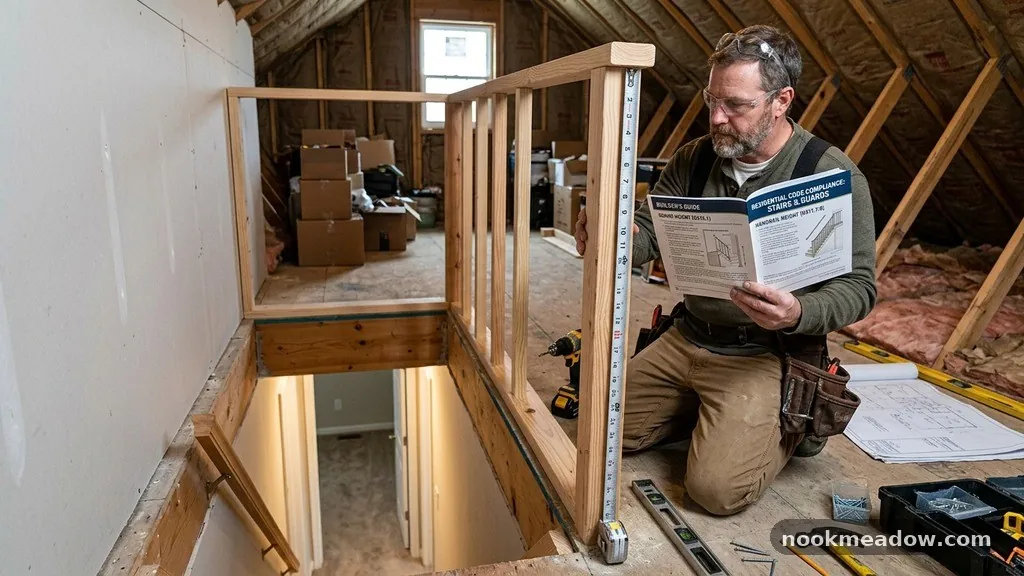
The most critical question when considering safety handrails involves the height requirements mandated by local building codes. While attic access points are often categorized as secondary, you should aim to meet the standard residential guardrail height of 36 to 42 inches. A rail that sits at 36 inches provides a comfortable height for the average adult to grasp while transitioning from a ladder.
If your local municipality follows the International Residential Code (IRC), you may find strict requirements for guardrails on any floor opening that exceeds specific dimensions. Always consult your local building department before finalizing your design, as codes for finished living spaces differ from those for unfinished storage areas.
Using a height of at least 34 inches is generally considered the absolute minimum to prevent a person from toppling over the edge. You should also ensure the rail is continuous along the open side of the attic hatch. If you are mounting the rail directly to the floor joists, make sure the fasteners are rated for structural loads.
A wobbly railing is often more dangerous than having no railing at all, as it provides a false sense of security. Always aim for a rigid, code-compliant installation that can withstand at least 200 pounds of lateral force.
Selecting Materials for Attic Railings
Choosing the right material for your project depends on your budget and the structural integrity of your attic floor. Wood is the most common choice because it is easy to cut, shape, and secure to existing floor joists. Pressure-treated lumber is excellent if your attic is prone to humidity, though standard pine works well for dry, interior spaces.
You should look for clear, straight boards that won’t warp over time, as a twisted rail can become a tripping hazard. Metal railings are another option, though they often require specialized welding or pre-fabricated kits that may not fit your custom opening.
If you choose wood, consider using 4×4 posts for the vertical supports to ensure maximum stability. You can then use 2×4 lumber for the top and bottom rails, which creates a sturdy frame. If you need to keep the weight down, cedar is a lightweight but durable alternative that looks polished without needing heavy coats of paint.
Always use exterior-grade screws or lag bolts to attach the posts to the joists. Avoid using nails, as they can pull out over time due to the vibrations caused by opening and closing the attic stairs.
Measuring Your Attic Space
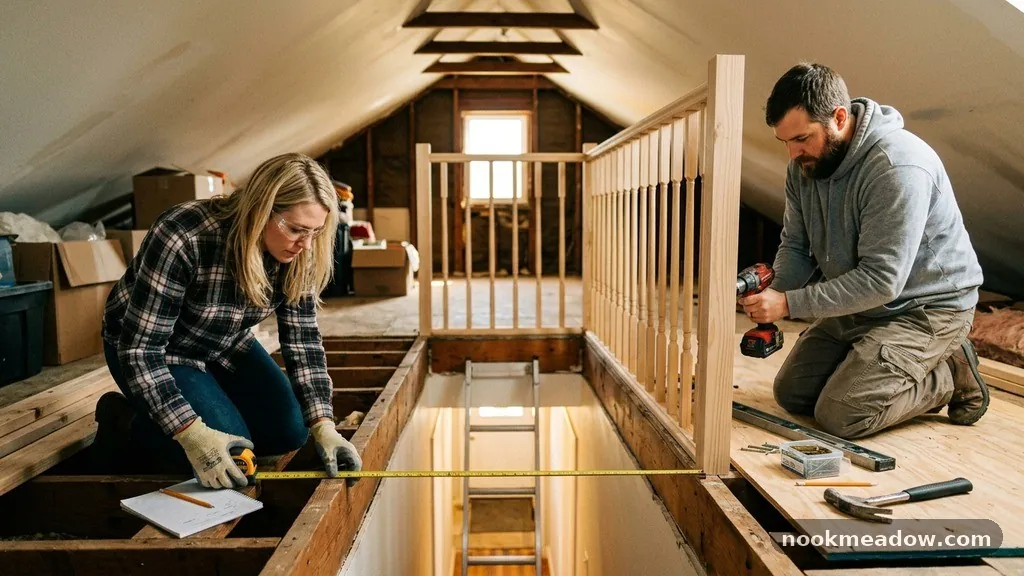
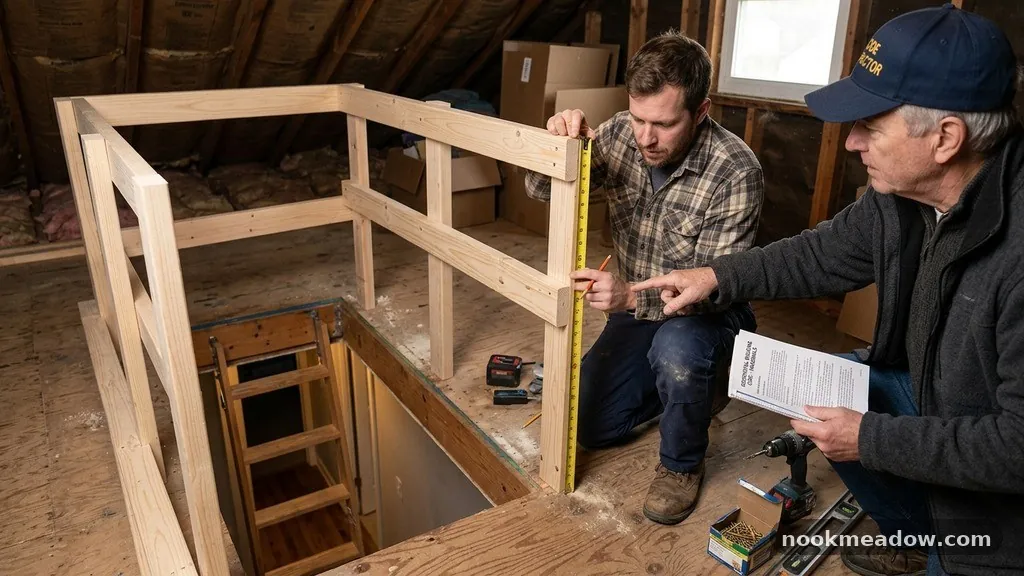
Before you buy any materials, you need to take precise measurements of the opening and the surrounding floor area. Start by measuring the length and width of the attic hatch, including the frame that sits above the ceiling joists. You want the railing to extend at least 12 inches past the edge of the opening on all sides to provide a safe landing zone.
Mark these dimensions on the floor with painter’s tape to visualize how much clearance you will have for walking. If the space is tight, ensure the railing doesn’t block the path of the attic ladder itself.
It is also important to measure the distance between the joists, as this is where your vertical posts will be anchored. If your joists are spaced 16 or 24 inches on center, you must align your posts to land directly over these supports. If the layout doesn’t align, you may need to install blocking between the joists to create a solid mounting surface.
Failing to anchor into structural members will result in a weak railing that could fail if you lean on it. Take your time during this phase, as accurate measurements are the foundation of a safe installation.
Installing Structural Blocking
If your attic floor joists do not align perfectly with where you need your posts, you must add structural blocking. This involves cutting pieces of dimensional lumber that fit snugly between two existing joists and securing them with metal joist hangers. Once the blocking is in place, you have a solid surface to drive your lag screws through the flooring and into the wood.
This method provides the required rigidity for the entire railing system. Never rely on the subfloor plywood alone, as it can crack or pull up under pressure.
You should use 2×8 or 2×10 lumber for the blocking, depending on the size of your current ceiling joists. Ensure the top of the blocking is flush with the top of the joists to maintain a level surface for your flooring. If you are working in a tight crawl space, having a helper to hold the lumber in place while you fasten it makes the process much easier.
Always use high-quality wood screws or structural bolts for these connections. This extra effort during the framing phase ensures that your safety handrails will remain firm for many years to come.
Comparing Safety Railing Options
When planning your layout, you have a few different styles to choose from depending on the traffic in your attic. Some homeowners prefer a simple “U” shape that protects three sides of the opening, while others install a gate to prevent accidental falls. The table below compares these common configurations based on ease of install and safety level.
| Railing Configuration | Installation Difficulty | Safety Level | Best Use Case |
|---|---|---|---|
| Three-Sided Fixed Rail | Moderate | High | Standard attic storage access |
| Spring-Loaded Gate | High | Very High | Homes with pets or small children |
| Removable Section | Moderate | Medium | Rarely accessed attic spaces |
| Full Perimeter Guard | High | Highest | Large, frequently used attic rooms |
Each of these configurations serves a different purpose, so choose the one that fits your specific workflow. If you are moving large boxes in and out of the attic, a swing gate might get in the way, making a fixed rail a better choice.
However, if you are concerned about safety when the ladder is retracted, a gate provides a crucial physical barrier. Always prioritize the safety of the user over the convenience of the design.
Tools and Hardware Requirements

Having the right tools is essential for a clean and professional-looking project. You will need a circular saw for cutting your posts and rails to the correct length, along with a drill for driving in your heavy-duty fasteners. A level is non-negotiable; you must ensure every post is perfectly plumb to keep the railing stable.
A miter saw is also helpful if you decide to add decorative caps to your posts or miter the joints on your top rail. Having a tape measure and a pencil for marking your cuts will save you from making costly errors.
Regarding hardware, avoid standard drywall screws as they are brittle and can snap under pressure. Instead, use structural wood screws or galvanized lag bolts that are at least 4 inches long. You should also pick up some metal corner brackets if you want to reinforce the joints where the horizontal rail meets the vertical post.
If you are concerned about moisture or pests, consider applying a coat of wood sealer to the ends of the boards before installation. For more on general safety standards, you can review the International Association of Certified Home Inspectors resources on attic access.
Managing Attic Floor Clearance
One common mistake when adding safety handrails along the top landing edge of an attic opening is crowding the work area. You need enough space to stand, turn, and maneuver boxes without hitting the railing or the ladder mechanism. Try to maintain a clearance of at least 24 inches between the rail and the edge of the hatch.
This allows for a comfortable transition as you step off the ladder and onto the attic floor. If your attic is small, consider mounting the rails slightly further back to maximize usable space.
Think about the path you take when walking to your storage bins. If the railing creates a bottleneck, you might find yourself constantly bumping into it, which eventually loosens the fasteners. Use painter’s tape on the floor to simulate the footprint of the railing before you start drilling.
Walk through the motions of carrying a box to ensure you have enough room to pivot safely. A well-designed rail should feel like a natural guide rather than an obstacle in your path.
Painting and Finishing Touches
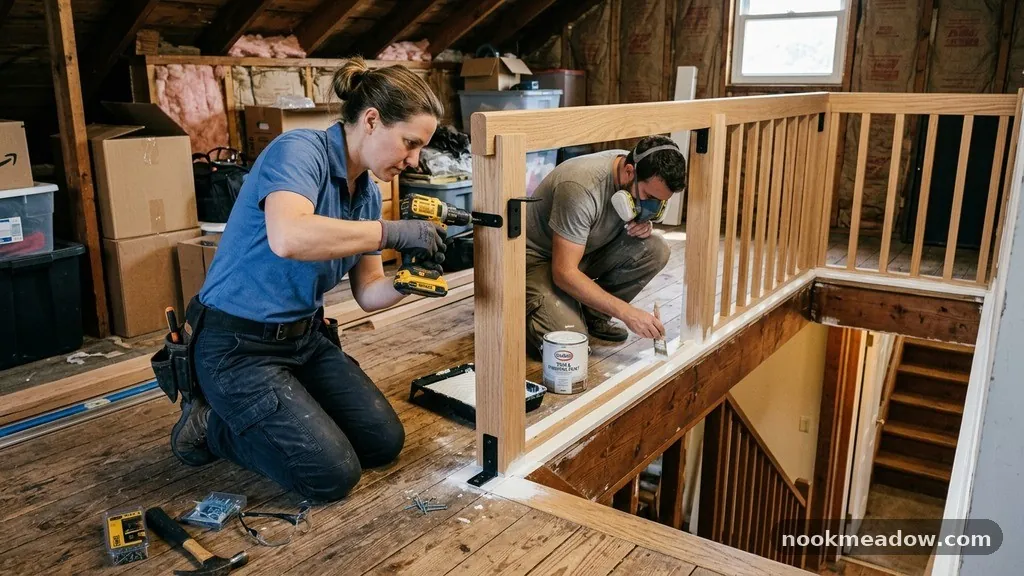
After the structure is secure, you should sand the wood to remove any splinters or rough edges. This is particularly important for the top rail, which will be the primary point of contact for your hands. If you are using pine, a light coat of primer followed by a durable semi-gloss paint will protect the wood and make it easier to clean.
For a more aesthetic look, you could use a wood stain that matches your home’s interior trim. Make sure the finish is fully cured before you start using the attic again.
If you want extra visibility, consider adding reflective tape or a small LED light near the railing. This helps you locate the edge of the opening if you are accessing the attic in dim lighting. You could also install a rubber grip on the top rail to provide better traction for your hands.
These small additions improve the overall usability of the space and make the area safer for everyone. Taking the time to finish the project properly makes it feel like an intentional part of the home.
Maintaining Your Railing System
Even the best-installed railings require periodic maintenance to ensure they remain safe. At least once a year, walk through the attic and check every screw and bolt for signs of loosening. The natural expansion and contraction of wood due to temperature changes can sometimes cause fasteners to work their way out.
If you notice any movement in the posts, tighten the bolts or add a secondary fastener to lock it in place. If the wood shows signs of rot or cracking, replace the affected board immediately.
It is also a good idea to check the floor joists underneath the railing for any signs of stress. If you see cracks or sagging in the wood, you may need to add additional supports or sister the joists for extra strength.
Keeping the area free of debris and clutter also helps you spot potential issues early. By making these checks part of your annual home maintenance routine, you ensure that your attic remains a safe and reliable storage environment.
Common Questions About Attic Railings
Is a railing required by law for all attic openings?
While many local codes do not strictly mandate railings for unfinished attics, they are highly recommended for safety. If you convert your attic into a living space, however, you will almost certainly be required to install guardrails that meet specific IRC standards for height and baluster spacing.
Can I attach the railing to the drywall ceiling?
No, you should never attach a railing to the drywall or the ceiling joists alone. The railing must be anchored into the structural floor framing or the attic hatch frame to provide adequate support. Drywall is not strong enough to hold the weight of a person leaning against a guardrail.
What is the best way to handle a small attic opening?
If your opening is small, you might consider a removable railing system that allows you to clear the space when bringing up large items. Alternatively, install the railing on the sides that are not used for entry to provide a safety buffer without compromising access.
How do I make the railing look less industrial?
You can use decorative post caps, mitered corners, and high-quality trim paint to make the railing look like a finished piece of carpentry. Choosing a wood species like oak or maple and applying a clear varnish can also give it a more refined appearance that complements your home.
Do I need balusters for an attic railing?
Most residential codes for guardrails require balusters spaced no more than 4 inches apart to prevent falls. If your attic railing is essentially a safety bar, you might not strictly need them, but they are a great safety feature if you have children or pets who might be in the attic.
Final Practical Considerations
Adding safety handrails along the top landing edge of an attic opening is a project that balances utility with essential home protection. By focusing on structural integrity and proper measurements, you create a secure transition point that prevents accidents.
Do not underestimate the importance of anchoring your posts into the joists or the value of a well-placed handhold. Whether you opt for a simple wooden frame or a more complex gated design, the effort you put into this installation will pay off in peace of mind.
Start by inspecting your current attic joists and sketching out a design that fits your specific layout. Gather the necessary materials, ensure you have the right tools on hand, and take your time with the structural connections. If you find yourself unsure about a specific step, consult with a local carpenter or check your municipal building code for guidance.
A safe attic is a functional attic, and with these steps, you are well on your way to securing your space. Feel free to reach out to a local professional if your attic framing requires more complex structural reinforcement.